Drywall is the unsung hero of interior construction, providing a smooth and clean canvas for our homes. However, over time, it can develop cracks and holes that mar its appearance.
Fear not, for with the right knowledge and techniques, you can master the art of drywall repairs paired with exterior painting to achieve flawless, seamless surfaces in your home.
This blog covers the world of drywall repairs, focusing on key techniques and tips to help you achieve professional-looking results.
Understanding the Basics of Drywall
Before diving into the repair process, it’s essential to understand what drywall is and how it works. Drywall, also known as gypsum board or sheetrock, is a common building material made from gypsum plaster sandwiched between two layers of paper. It’s used to create interior walls and ceilings and provides a smooth surface for painting or wallpapering.
Common Drywall Issues
Drywall is susceptible to various issues over time, including:
- Cracks:These can occur due to settling, temperature fluctuations, or structural movement.
- Dents and Holes:Furniture bumps, doorknob impacts, or accidents can leave unsightly dents and holes.
- Nail Pops:Over time, nails or screws used to attach the drywall to the studs can protrude, creating visible bumps.
- Water Damage:Leaks or floods can damage drywall, causing it to warp or develop mold.
Mastering Drywall Repairs
To achieve a flawless finish when repairing drywall, follow these steps:
Gather the Necessary Tools and Materials
Before you begin, ensure you have the following:
- Drywall patch or joint compound
- Putty knife or drywall knife
- Sandpaper (medium and fine grit)
- Mesh tape or paper tape
- Sanding block
- Primer and paint
- Safety gear(goggles, dust mask, gloves)

Prepare the Area
Clear the damaged area of any loose or damaged material. For larger holes or cracks, you may need to cut a square or rectangular hole around the damaged area to create a solid base for patching.
Apply Mesh or Paper Tape
For cracks or holes, apply mesh tape or paper tape over the damaged area. This tape helps provide stability and prevents the patch from cracking in the future.
Patch with Joint Compound
Apply a thin layer of joint compound over the tape using the putty or drywall knife. Feather the edges to blend it with the surrounding wall. Allow it to dry completely.
Sand and Repeat
Once the first layer is dry, lightly sand it with medium-grit sandpaper. Apply a second layer of joint compound, making it slightly wider than the first. Sand again when dry. Repeat this process until the patched area is flush with the surrounding wall.
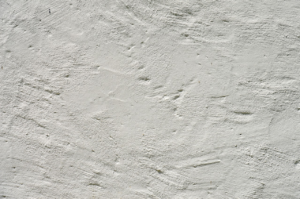
Texture Matching
If your wall has a textured finish, such as orange peel or knockdown, you’ll need to match the texture. This may involve using a texture spray or applying a compound with a texture sponge.
Prime and Paint
Once the patch is smooth and matches the surrounding surface, prime the repaired area and paint it to blend with the rest of the wall.
Final Inspection
After the paint has dried, inspect the repaired area for any imperfections. Touch up as needed to achieve a flawless finish.
When it comes to home maintenance and improvement in Bronx, NY, you can trust Golden Touch Renovation. Whether you need expert drywall repair, exterior painting, roof repair, or chimney repair Bronx NY, we are here for you! Contact us today.